That's it, really. I've been busy with working on the house, working on the yard, getting kids through the school year with decent grades and then into summer sports, and actually working, to blog about anything much.
Here's a quick list-format rundown of things we've been working on, house-wise:
Repainting the inside of the enclosed front porch, so it can be a functional playroom and office. The playroom half is done in blue and clouds, a lighter version of the murals in the kids' room, With a bit of functional chalkboard paint, and the office is white, with the columns (erroneously, as it turned out) sketched in dry-brush style in blueprint cyan.
Gardening - in front, in back, the side yards. I had the most spectacular poppy bed, and then we had a storm.
This photo is from last spring's first tiny starts. Nearly all have survived the intervening year and my dianthus to either side of the porch steps are now enormous, over a foot tall. I've expanded those beds as far as the corners of the porch and added beds to either side of the steps down to the street.
It was a long winter (snow until the end of March!) and I leapt into gardening as soon as I was allowed to. I've spent days out there getting filthy and sunburnt. It's still very small beginnings, but it will become lovely over time. Also, I already have one hard green tomato. Any further gardening talk gets its own post, because I can go on and on about gardening.
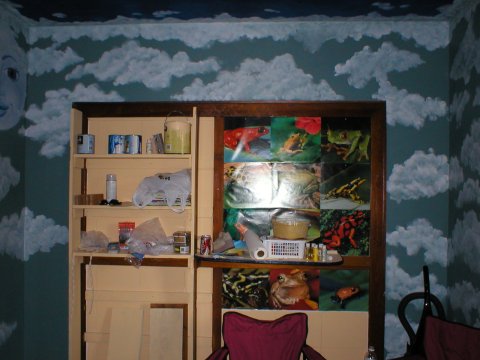
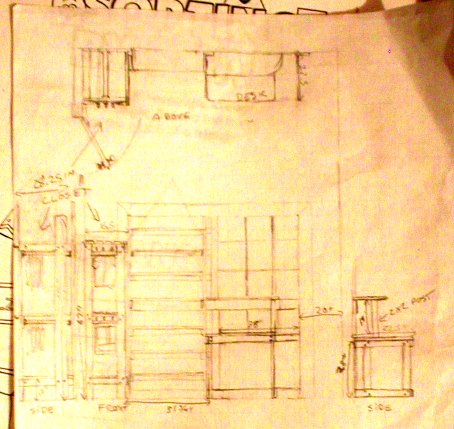
Reorganizing and updating the kids' storage in their room. This was a big project and involved finding things that worked with much of what we already had, and which will transition well from little-boy to big-boy. Tougher than you'd think.
Going through boxed up outgrown toys and baby things for hand me downs to pass on. I got rid of about five boxes of stuff that way. No pictures. That was pure chaos!
Turning half of the unfinished dining room into a temporary kitchenette, with various freestanding storage things, in order to make it possible to work on the kitchen. Also, no pictures. We've already taken out six 1940's steel cabinets in the kitchen, it's a madhouse. All of those will go to the laundry room.
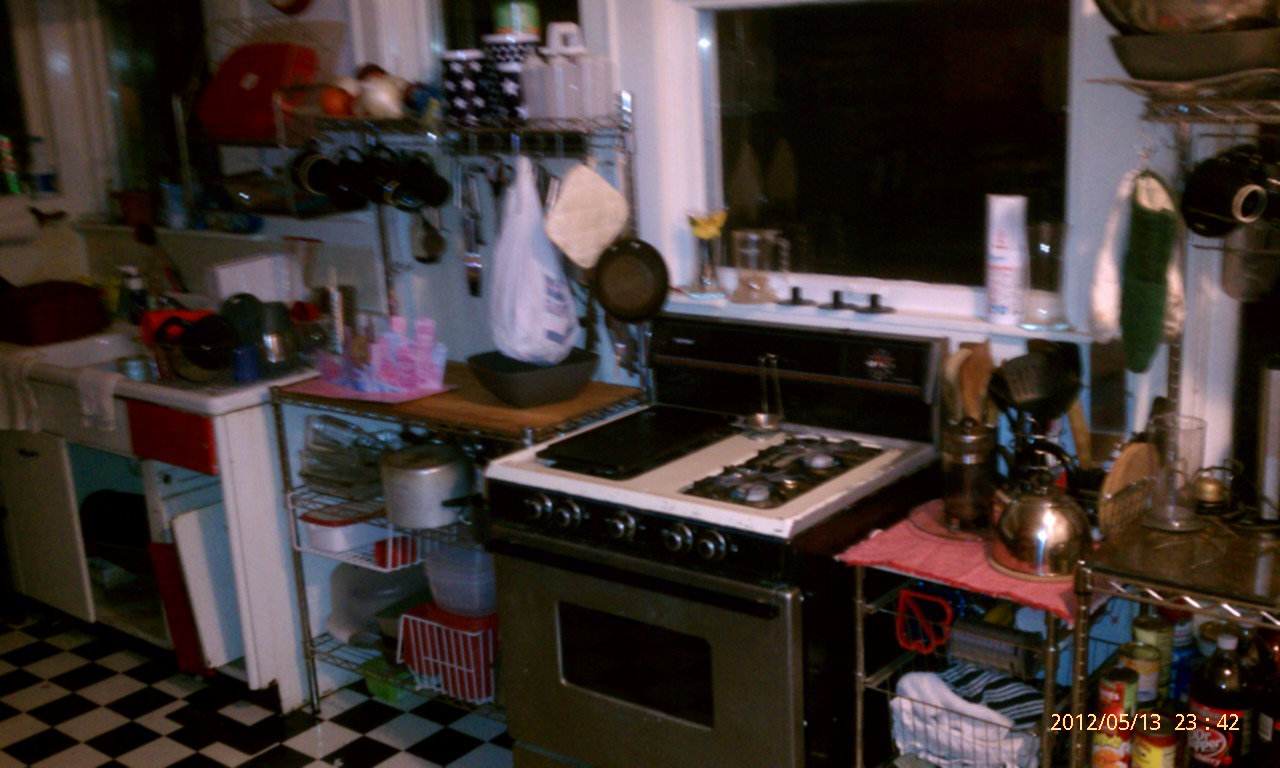
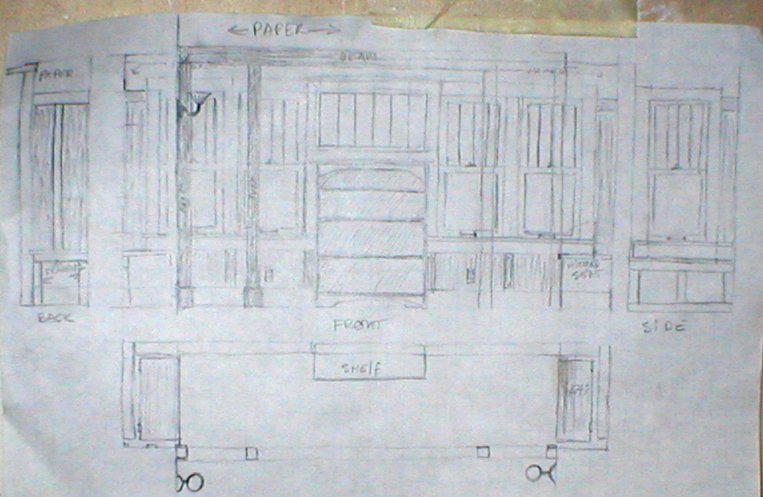
Preparing for the kitchen renovation has been really absorbing. Most recently, we've been getting the cabinets measured for, and ordered. We've driven all over hoping for a wonderful deal on period-appropriate tile, like we got on the bathroom, but will most likely end up using reasonably close stuff from a big box store.We already have the new sink, and the new fridge and stove, but the sink isn't installed yet, plumbing and gas needs moving about. This, also, will get its own post. There are drawings. And a bushel of photos.
Now, those old cabinets, the ones going into the laundry room? The laundry room doesn't exist yet. This has been stressful, but it's a part of the Big Plumbing Adventure that needed to wait for spring and the end of freezes to take care of. That's coming up in a couple of weeks, and will mean a few days without water.
Finally, I spent a big chunk of winter being (curably, but miserably) ill and stewing over delayed renovations by sleuthing other houses. Thanks to an online house-aficionado acquaintance, I managed to locate another Sherman/Sheridan. Sadly, it's probably been torn down, as it was a tax default sale. That, too, is another story for another day.
House: 1910s probably Aladdin Readi Cut kit house. Desperately in need of love and restoration.
Slaves: One woman, experienced house restorer; one man, experienced in new construction.
Budget: small.
Showing posts with label kitchen. Show all posts
28 May 2013
08 August 2012
Kitchen in progress, Part 1
So, we decided to change our plans. No Ikea kitchen for us. No prefab cabinets at all. We are going totally custom, and doing it ourselves. ALL of it. Cabinets, sink, 20's style banquette, and built ins.
The plan:
The layout will be very similar to the posted plan examples. Sink and dishwasher (yes, I have decided I want one) under the short wide window in the middle of the kitchen, double door fridge next to a pull out broom closet, cabinets up to the ceiling, banquette where the big 1940s/1950s double sink cabinet is now, stove on the wall with the chimney, racks/rolling worktops in front of the long windows. Lots of integrated stuff, a pull out trash bin, a fold-out ironing board set into the door of the broom closet, probably an appliance garage too. I'll be using furniture grade plywood for the cabinets and hardwood for the doors.
Tools:
Level, table saw (borrowed), finish nailer, drill, sander, router and table, and whatever else we already have or need to get or borrow.
References:
We are seriously considering doing a custom cast concrete sink and drainboard, and possibly cast-in-place concrete countertops. The other option being tile, as I love to lay tile on counters. Not so much on floors, but I am already committed to tiling the floor.
The walls will be white beadboard wainscot from lintel height to baseboard where they are visible, and bright red above (possibly there will be a frieze stencil design, but not too keen on that in a kitchen environment). The ceiling will be papered over the drop ceiling tiles with a tin-tile pattern relief paper, and that will be painted white.
All of that is eventual. The current status is vinyl sticky tile, steel cabinets that don't fit the space (and which will become my laundry room cabinets after the reno), and not enough of them, the old sink cabinet that is over an unheated extension and is also falling apart despite heroic attempts to save it, and the new stove and fridge. The fridge is currently sitting where the stove will go, and isn't hooked to the water because that's not going to be over there. We'll run the line when we run the new supply and drainage lines for the relocated sink. Which would be the week after we get the pros to run the gas line back to where it used to be and close off the current stove line safely.
We have the fridge, so we can design, plan and fit the fridge wall cabinets around it now. I plan to build the frames and install them on their bases, and build and hang the wall cabinet frames. Doors can follow after the rest of major work gets done - I've removed doors as a cosmetic choice in when I was a renter, reinstalling on move out, so it won't bug me. A bonus to this is that we can take our time to hash out pulls and knobs. I don't want anything that might catch on my clothes or anything since it's a narrow space, Mr. Vintage House wants knobs and protruding handles. We have months to argue before this becomes an issue.
After that, the stove wall cabinets get built and installed, the stove gets moved, and we start on relocating the sink. After the sink is done, we will build the banquette under the corner windows and have someplace to eat besides the living room.
Progress, why does it feel like sliding backwards?
![]() |
| Not exactly this, anymore. |
Why? Well, frankly, Ikea is too far away to realistically be able to get spare parts, 6000 dollars is a lot to spend for not-quite-fitting cabinets, and ... a good friend of mine got defrauded by a cashier at the Atlanta GA Ikea, with a very poor response from Ikea loss prevention (I would not shop at that one for a while, folks. Go elsewhere). Thus, between the distance to the nearest Ikea and the bad taste that their treatment of my friend left in our mouths, we elected to take our business elsewhere.
![]() |
| Perhaps a bit more like this, instead. |
The layout will be very similar to the posted plan examples. Sink and dishwasher (yes, I have decided I want one) under the short wide window in the middle of the kitchen, double door fridge next to a pull out broom closet, cabinets up to the ceiling, banquette where the big 1940s/1950s double sink cabinet is now, stove on the wall with the chimney, racks/rolling worktops in front of the long windows. Lots of integrated stuff, a pull out trash bin, a fold-out ironing board set into the door of the broom closet, probably an appliance garage too. I'll be using furniture grade plywood for the cabinets and hardwood for the doors.
Tools:
Level, table saw (borrowed), finish nailer, drill, sander, router and table, and whatever else we already have or need to get or borrow.
![]() |
| A little of this one, too. |
References:
- Easy-to-build kitchen cabinets for the remodeled farmhouse, free facsimile ebook
- Shelves, Cabinets and Bookcases
- Shop Drawings for Craftsman Interiors
- Hoosier Kitchen Plan Book 1920
The cabinets will be white, probably with chrome hardware. The appliances will be modern, but white. The floor will be white with black accents. Backsplashes will be tiled, white with black and little bits of red.
The walls will be white beadboard wainscot from lintel height to baseboard where they are visible, and bright red above (possibly there will be a frieze stencil design, but not too keen on that in a kitchen environment). The ceiling will be papered over the drop ceiling tiles with a tin-tile pattern relief paper, and that will be painted white.
![]() |
| There are no good pictures of my kitchen, it's a series of unfortunate shortcuts and concessions all piled on each other, ruining the original flow and wasting all the space. |
We have the fridge, so we can design, plan and fit the fridge wall cabinets around it now. I plan to build the frames and install them on their bases, and build and hang the wall cabinet frames. Doors can follow after the rest of major work gets done - I've removed doors as a cosmetic choice in when I was a renter, reinstalling on move out, so it won't bug me. A bonus to this is that we can take our time to hash out pulls and knobs. I don't want anything that might catch on my clothes or anything since it's a narrow space, Mr. Vintage House wants knobs and protruding handles. We have months to argue before this becomes an issue.
After that, the stove wall cabinets get built and installed, the stove gets moved, and we start on relocating the sink. After the sink is done, we will build the banquette under the corner windows and have someplace to eat besides the living room.
Progress, why does it feel like sliding backwards?
16 May 2012
I got it!
The foldaway built-in ironing board cabinet, that is. The door is there, the cabinet itself is in great shape, with all moving parts intact. It's very petite, so it will work perfectly in its intended use as an in-door mounting on a pull-out pantry cabinet.
It has the sleeveboard, and the pop-up support and the covers are still on both boards, so patterning new ones will be a breeze. It has never been painted, so no stripping needed!
Edited to add this image from a 1920s catalog for Ideal Furnishings, what looks to be exactly the model I found.
The folks I bought it from are moving, which why they are selling off their salvage. It is a pity, because they are awesome people.
It has the sleeveboard, and the pop-up support and the covers are still on both boards, so patterning new ones will be a breeze. It has never been painted, so no stripping needed!
Edited to add this image from a 1920s catalog for Ideal Furnishings, what looks to be exactly the model I found.
The folks I bought it from are moving, which why they are selling off their salvage. It is a pity, because they are awesome people.
14 May 2012
Wish me luck!
Why? Because I might have a line on a foldaway ironing board cabinet, salvaged, in what looks like decent shape. If I can get it, I will mount it as the front of a pull-out broom closet unit. in my redone kitchen.
Cross your fingers for me!
26 December 2011
Research: A resource for kitchen restoration
The Kitchen Plan Book, 1920 Published by Hoosier Manufacturing (the cabinet people!) is available at the Internet Archive's online texts archive. It is a free download, or you can read it online. It's the collected best submissions from a kitchen design contest, and shows a fantastic variety of kitchens from classic mid-late 1910s bare-bones rooms with wood stoves to ultra-modern, deluxe, fitted kitchens that would not look out of place in a modern home.
Here are a few excerpts:
This one is for a small kitchen not unlike ours. I want built in everything, like this little kitchen has.
I especially love this one, though it's for a much more architecturally interesting house, with an octagonal kitchen. It looks like something you might find in a new house with a modern fitted kitchen.
Advice, if you want to download it: remove the extra periods from the filename, or your pdf reader will tell you it's a corrupted file.
If you want to get a hard copy of an earlier one, American Bungelow has their reprint of the 1917 edition of the Kitchen Plan Book (all different designs from this one, different year's contest) on sale, half price.
24 December 2011
Return of the Kitchen Plans
Part of gearing up for a return to work on the house is updating plans, and updating cost lists. One thing that hasn't changed is that we intend to use Ikea kitchen cabinets as our budget solution for making our kitchen more usable. We are going with white Adel cabinet fronts because they look the most like what used to be here (we found the remains of a door in the basement), and using hoosier-style pulls instead of knobs and handles because, as big a room as it is, it is still a tight space.
I wish the Ikea planner gave a little more control over the walls, and I don't really understand why the stove hood won't fit in with the short open shelves (there will be a vent hood there of some kind, but we may have to fabricate it ourselves), but I'm happy with the general look.
I love the light in the room, and I never, ever wanted to cut those long windows in half, as I would certainly have to do if I let the cabinets and counters cut across them. I also want, but don't have room for, a permanent kitchen island or kitchen table in the middle of the room. Given these two factors, I decided to use kitchen carts as combined movable workspaces and additional storage for things like mixing bowls, the wok, baskets of folded kitchen towels, art materials for the kids, all kinds of things we won't need to hide.
The sink is getting put back where it used to be, under the short wide window where the stove sits now, looking lonely. Where it is now, it has the water lines running through an unheated, uninsulated space under what was originally a porch that got enclosed some time in the late 1920's, and expanded into sometime in the 1940's. That space is a perfect spot for a table and a couple of benches for eating, doing homework or making messy crafts.
This is what it looks like now, with a round table, all the counter and most of the storage on one side, the sink crammed up against the back door, and the stove hanging out in the middle of one wall. So much wasted space, not a great working layout, and a bunch of great 1940's steel cabinets that will become my laundry room cabinets when we do the kitchen reno.
Here is the plan view, showing how much better the new layout (which is likely not too different from the original layout) will use the same space.
The fridge/storage/pantry wall, with some workspace (I foresee the microwave and telephone taking up residence here). Those tall cabinets are the pantry and cleaning closet, the high cabinets will be more pantry. Yes, I have already purchased my stepstool.
The old Ikea planner version of the kitchen redesign, with the medium brown wood finish Adel fronts and gray counters. Between my research showing that white was popular, locating the white cabinet door in the cellar, and realizing that a long narrow room like this never benefits from loads of dark wood, we elected to go with the white. However, as you can see, the basic plan remains the same.
And an overview of the kitchen from the new planner, with the white Adel fronts, more open shelving (we like putting coffee cups, spice and dishes on display) and better-fitting carts. I expect my entire basement will be filled with boxes in short order, though the renovation isn't going to happen until spring.
Oh, I forgot to mention the best part: the cost for all the cabinets, counters, sink and furnishings is under 5 grand. Yay Ikea!
21 January 2008
Q&A time! More Sticky Tile Advice
We are still on Hiatus, but I got a question today that I think is worthy of a small update. A lady named Marie posted a comment on this post asking for help with her self-adhesive tile installation:
Marie, I'd have emailed you but you didn't leave an email address :)
It sounds as though your installer did not level the floor properly. Applying a new substrate is only part of the job - the substrate must be levelled and smoothed with a filling compound and allowed to cure, then sometimes re-levelled, before tiles are applied. This is even more important with larger or self-adhesive tiles, as they require a perfectly level surface to adhere properly.
The right application tools are very important. Having some way to press the tiles down, such as a roller, is crucial to bonding the tiles in place. If this is not done immediatley after the tiles are applied (usually after the entire floor has been laid), the tiles can release from the floor due to temperature fluctuations, and make a sticky noise when the floor is walked on. It is equally important not to walk on the new floor for the time recommended on the tile package, as walking on it may cause the adhesive to slip while it is curing.
Also, the quality of the self-adhesive tiles can significantly affect their sticking power - I've used expensive tiles and cheap ones, and universally had cheap tiles slip, peel and creep, even when thoroughly pressed down with a weighted roller. I've had best luck with the Armstrong brand of self-adhesive tiles, though the quality of tiles they produce is also affected by the price range and intended use. Some cheaper tiles will peel right up on a hot day, for example.
A slightly uneven surface is one of the reasons we chose small, ceramic tiles for our bathroom. The cost would have been approximately the same for inexpensive tiles (our ceramic tile was about 1.80 a square foot) + grout + substrate + leveling and filling compound vs quality self-adhesive tiles (generally about 3.00 or more a square foot) + substrate + leveling and filling compound.
On the positive side, it tends to be fairly inexpensive to pull up and replace self-adhesive tiles in order to correct insufficient floor leveling. Good luck!
i had tile put down this summer 12x12 good tile he pull up all the old tile & cleaned the floor put down some wood then the self stick tile now every time i walk on it ,it sounds sticky.What can i do about it. THANK U MARIE
Marie, I'd have emailed you but you didn't leave an email address :)
It sounds as though your installer did not level the floor properly. Applying a new substrate is only part of the job - the substrate must be levelled and smoothed with a filling compound and allowed to cure, then sometimes re-levelled, before tiles are applied. This is even more important with larger or self-adhesive tiles, as they require a perfectly level surface to adhere properly.
The right application tools are very important. Having some way to press the tiles down, such as a roller, is crucial to bonding the tiles in place. If this is not done immediatley after the tiles are applied (usually after the entire floor has been laid), the tiles can release from the floor due to temperature fluctuations, and make a sticky noise when the floor is walked on. It is equally important not to walk on the new floor for the time recommended on the tile package, as walking on it may cause the adhesive to slip while it is curing.
Also, the quality of the self-adhesive tiles can significantly affect their sticking power - I've used expensive tiles and cheap ones, and universally had cheap tiles slip, peel and creep, even when thoroughly pressed down with a weighted roller. I've had best luck with the Armstrong brand of self-adhesive tiles, though the quality of tiles they produce is also affected by the price range and intended use. Some cheaper tiles will peel right up on a hot day, for example.
A slightly uneven surface is one of the reasons we chose small, ceramic tiles for our bathroom. The cost would have been approximately the same for inexpensive tiles (our ceramic tile was about 1.80 a square foot) + grout + substrate + leveling and filling compound vs quality self-adhesive tiles (generally about 3.00 or more a square foot) + substrate + leveling and filling compound.
On the positive side, it tends to be fairly inexpensive to pull up and replace self-adhesive tiles in order to correct insufficient floor leveling. Good luck!
Labels:
bathroom,
blogging,
budget,
kitchen,
shopping,
sticky tile,
temporary solutions,
tile,
tools
17 January 2007
Castles in the Sky
Or, "Cabinets in the Kitchen." It makes no difference, because one is as real as the other, unfortunately.
However, dreaming can be fun, so I downloaded the Ikea kitchen design software and went on with my imagined redesign of the kitchen. I'd been playing with various configurations for some time in my other 3 remodeling software packages, but this really works well 9this year - last year's crashed on me too much to bother with). We're considering Ikea as a source for reasonably priced cabinetry that we can install ourselves, so this gave me a nice idea about how much it might be to get the whole mess from them (under 7 grand, including fripperies like a stove and a dining area, and not including shipping). There's the added fuzzy of following a kind of tradition - the house and everything in it having originally been ordered from catalogs - even if this is just a pipe dream.
First, here is a rough approximation of what we've got now, Ikea-style:

I'm guessing, from the five or so cabinet doors we found cobbled into a shelf in the cellar, that there was a basic kitchen built-in on the side where the counter is now, possibly also an icebox. The corner cabinet I roughed in in this is a homemade affair, cobbled together (fairly well, actually) form odds and ends of plank and tongue-and-groove boards, and goes from floor to ceiling. I like the midcentury steel cabinets, but they don't go with the house, and we need more storage and more counterspace.
Problems with the kitchen as it stands:
So I have a few things in mind to change, and some things to restore. I started out with a bare room and the knowledge that the original location of the kitchen sink was where the range is now, the stove had been in the inset where our dinette is now, and went from there. I got this:

Wow. I went with one of the more traditional "modern" cabinet fronts, "Ädel," on "Medium Brown," as it seemed more like what was once here. I put the range in the original location of the cookstove, I moved the refrigerator over and put tall cabinets between it and the partial wall for expanded storage (including a broom/cleaning storage closet, which we do not now have), put cabinets on the stove wall, filling the awkward inset with useful things, and relocated the sink to the original sink location, under the short window.
In order to avoid removing or obscuring original features (the long windows, which let so much wonderful light into the kitchen), I elected to put kitchen carts or some other portable storage/workspace solution on either side of the sink. And the dining area? Where the existing sink is, so nobody gets elbowed or bumped during breakfast. The sink I picked is one of two that I really love in the Ikea catalog, the one that looks like a vintage farm sink.
It's so much more usable that I just want to buy it NOWNOWNOW. Of course, this is not possible, and will entail a great deal more than seven thousand dollars, such as living without a kitchen for a couple of weeks while we move plumbing around and install everything. Never mind the money.
However, dreaming can be fun, so I downloaded the Ikea kitchen design software and went on with my imagined redesign of the kitchen. I'd been playing with various configurations for some time in my other 3 remodeling software packages, but this really works well 9this year - last year's crashed on me too much to bother with). We're considering Ikea as a source for reasonably priced cabinetry that we can install ourselves, so this gave me a nice idea about how much it might be to get the whole mess from them (under 7 grand, including fripperies like a stove and a dining area, and not including shipping). There's the added fuzzy of following a kind of tradition - the house and everything in it having originally been ordered from catalogs - even if this is just a pipe dream.
First, here is a rough approximation of what we've got now, Ikea-style:

I'm guessing, from the five or so cabinet doors we found cobbled into a shelf in the cellar, that there was a basic kitchen built-in on the side where the counter is now, possibly also an icebox. The corner cabinet I roughed in in this is a homemade affair, cobbled together (fairly well, actually) form odds and ends of plank and tongue-and-groove boards, and goes from floor to ceiling. I like the midcentury steel cabinets, but they don't go with the house, and we need more storage and more counterspace.
Problems with the kitchen as it stands:
- As you can see, there's LOTS of wasted space.
- The current sink location is both counterintuitive and just plain bad - the supply and waste pipes go through an unheated space under the original back porch).
- There's kind of a work triangle, but not really.
- If we want a vent hood, we will have to cut through the outer wall of the house if the stove stays where it is. Not good.
- There's no eating in the kitchen without traffic bumping into the hapless person next to the door.
So I have a few things in mind to change, and some things to restore. I started out with a bare room and the knowledge that the original location of the kitchen sink was where the range is now, the stove had been in the inset where our dinette is now, and went from there. I got this:

Wow. I went with one of the more traditional "modern" cabinet fronts, "Ädel," on "Medium Brown," as it seemed more like what was once here. I put the range in the original location of the cookstove, I moved the refrigerator over and put tall cabinets between it and the partial wall for expanded storage (including a broom/cleaning storage closet, which we do not now have), put cabinets on the stove wall, filling the awkward inset with useful things, and relocated the sink to the original sink location, under the short window.
In order to avoid removing or obscuring original features (the long windows, which let so much wonderful light into the kitchen), I elected to put kitchen carts or some other portable storage/workspace solution on either side of the sink. And the dining area? Where the existing sink is, so nobody gets elbowed or bumped during breakfast. The sink I picked is one of two that I really love in the Ikea catalog, the one that looks like a vintage farm sink.
It's so much more usable that I just want to buy it NOWNOWNOW. Of course, this is not possible, and will entail a great deal more than seven thousand dollars, such as living without a kitchen for a couple of weeks while we move plumbing around and install everything. Never mind the money.
10 January 2007
Writer's Block, or Living in the Project
So, here I am, camera in hand, readied to relate the news of living in the house for a whopping 2 weeks, and I find that my grasp of words has failed me.
Utterly.
I find myself thinking "Kitchen ... NO! Bathroom ... wait. Bedroom. Plaster? Yardwork? Snow?" This is followed by a dull moaning sound as my brain's gears fail. Madly, I continue to hunt for things to write about, grasping at "Scrubbing floors, perhaps? Or the kitchen drains? Oooo! How about the cellar?"
I'm not short of things to write about. I'm spoiled for choice. My brain is whirling like a magpie in a sequin factory. Too much to do, too much to tell, not enough focus.
Therefore, with this decision (or lack thereof), I give you some photographs. And some captions. That's all I can muster right now.
Look, that's food in the kitchen, and not tools! Okay, some of those are tools, but mostly it's actual kitchen stuff. We can cook in here now, as of about a week ago. The first week, though, it was pretty grim, and we didn't get the tools packed of to the cellar until we were nearly starving for a lack of cooking space.
That's what we do.
05 December 2006
Amazing Progress, Due to Unbearable Pressure
As everyone knows, we are under a lot of pressure around here to get done and moved in as soon as possible. So, with that bearing down upon us, (and the help of our dear friends) we have made some progress.
Thanks to J, the furnace is on a real electrical line (meaning, of course, the electric pilot sparker and the thermostat line), and most of the heat vents have now been vacuumed. The rest will be cleaned out tomorrow, and then the intake filter will get cleaned and we can throw the switch, turn on the gas, light the pilots and work in a warm house. We also magically have lights in the kitchen, with a bonus lightswitch!
The dining room bay has been reframed (where necessary), insulated (Hurrah! now the heat won't be sent directly out of the house from the vents in the bay!), and sheetrocked. It looks astonishingly civilized, barring the untaped seams.
The last remains of the old, nonfunctional, passthrough closet in the master bedroom were demo'd out, and the floor given a temporary patchjob. Relaying the boards and refinishing can wait, honestly. We have a nice seagrass rug I intend to tack down over the ugliness. All that remains in there is to remove Far Too Much Wallpaper, patching where that pesky wall was torn out, painting, and replacing the mouldings. We are now, as of tonight, properly armed with a scoring tool and more blades for the scraper, and I expect to be doing battle with the Powers Of Evil (six layers of old paper with two layers of paint) by Thursday.
The bathroom isn't any closer than last reported, but we did buy the rest of the tile, and found out how to return the extra. How did we end up with nearly 10 extra linear feet of edging tile? You tell me. The math checks out, but I must have overbought. Oh, and we did buy more grout, just in case. We can return that too, if we have to.
Yet to do, and urgently needed, is the ripping out and replacement of the hopelessly fractured dining room ceiling plaster. In addition to the quarter of it that has already fallen away, leaving a breathtaking view of the attic through the exposed lath, there is a large section - say 1/3 - that is partially keyed, but hanging onto lath that has almost entirely separated from the beams down the center of the room. This problem was made worse (as was to be expected) by our re-squaring of the dining room when we added the support posts a couple of months ago. The plaster's not salvageable in the time we have, so it must go. We have already purchased the drywall, and we have a plan of action that includes saving as much as possible of the original plaster, even giving our pressing schedule.
I still need to scrape, patch and paint the West wall of the kitchen, and re-engineer the sink cabinet drawers and doors, but mostly, the kitchen is at a "usable" stage, once the gas is on. There's stuff to do, but it's little stuff, by comparison.
I think we might just get moved in before Chris goes. This is my driving force, to have our home be our home, even for a little while, before he is gone for so long.
No pictures today, and probably not for a few days. The work is more important than the talking about it, but I promise to keep y'all posted on progress, even if it's short.
Thanks to J, the furnace is on a real electrical line (meaning, of course, the electric pilot sparker and the thermostat line), and most of the heat vents have now been vacuumed. The rest will be cleaned out tomorrow, and then the intake filter will get cleaned and we can throw the switch, turn on the gas, light the pilots and work in a warm house. We also magically have lights in the kitchen, with a bonus lightswitch!
The dining room bay has been reframed (where necessary), insulated (Hurrah! now the heat won't be sent directly out of the house from the vents in the bay!), and sheetrocked. It looks astonishingly civilized, barring the untaped seams.
The last remains of the old, nonfunctional, passthrough closet in the master bedroom were demo'd out, and the floor given a temporary patchjob. Relaying the boards and refinishing can wait, honestly. We have a nice seagrass rug I intend to tack down over the ugliness. All that remains in there is to remove Far Too Much Wallpaper, patching where that pesky wall was torn out, painting, and replacing the mouldings. We are now, as of tonight, properly armed with a scoring tool and more blades for the scraper, and I expect to be doing battle with the Powers Of Evil (six layers of old paper with two layers of paint) by Thursday.
The bathroom isn't any closer than last reported, but we did buy the rest of the tile, and found out how to return the extra. How did we end up with nearly 10 extra linear feet of edging tile? You tell me. The math checks out, but I must have overbought. Oh, and we did buy more grout, just in case. We can return that too, if we have to.
Yet to do, and urgently needed, is the ripping out and replacement of the hopelessly fractured dining room ceiling plaster. In addition to the quarter of it that has already fallen away, leaving a breathtaking view of the attic through the exposed lath, there is a large section - say 1/3 - that is partially keyed, but hanging onto lath that has almost entirely separated from the beams down the center of the room. This problem was made worse (as was to be expected) by our re-squaring of the dining room when we added the support posts a couple of months ago. The plaster's not salvageable in the time we have, so it must go. We have already purchased the drywall, and we have a plan of action that includes saving as much as possible of the original plaster, even giving our pressing schedule.
I still need to scrape, patch and paint the West wall of the kitchen, and re-engineer the sink cabinet drawers and doors, but mostly, the kitchen is at a "usable" stage, once the gas is on. There's stuff to do, but it's little stuff, by comparison.
I think we might just get moved in before Chris goes. This is my driving force, to have our home be our home, even for a little while, before he is gone for so long.
No pictures today, and probably not for a few days. The work is more important than the talking about it, but I promise to keep y'all posted on progress, even if it's short.
23 October 2006
More silliness and a resource referral
Now the house has low self esteem. [falls on floor laughing] I suppose I can see why, but she's really getting much prettier, even with the incompleted remodelling. I am reminded of the old Rejuvenation ads that had a little label inside a heating register that said "Oh, Thank goodness you are here! The last owners had TERRIBLE taste!" or something to that effect.
Okay, to get back on subject, I am begging, really begging you to buy something from these people. I ask because I've been bugging them with questions about their books and they've been lovely about answering, but it's just not in my budget to get the book(s) I want these days.
I'm just hoping they are still doing this one when I have the money, oh, and this and this and this...
Okay, to get back on subject, I am begging, really begging you to buy something from these people. I ask because I've been bugging them with questions about their books and they've been lovely about answering, but it's just not in my budget to get the book(s) I want these days.
I'm just hoping they are still doing this one when I have the money, oh, and this and this and this...
25 September 2006
Advice for the Sticky Tile Questioner
Sweetie, your email bounced, so I'm making the reply a post!
Sticky tiles on counter as a temporary face lift atop hideous old Formica until real money/real remodelling comes along:
I've done this in my mom's kitchen and mine (both are temporary!!! and will need to be replaced in a few years), and for both projects I used the stone-textured tiles that are fairly rigid. They cut with a razor knife, just like the thinner/cheaper ones, but take a bit more effort (and a straight edge - like a counter top edge- to snap them over) to snap.
Teh best advice I can give is to make sure your counter is CLEAN and smooth (I had to mount that molding on the edge and shim underneath to make my 3 independent counter sections contiguous and smooth enough to tile). The tiles will stick best to Formica if it's not bubbled, chipped or damaged. If the counter is damaged/chipped/has an uneven surface, ask the floor guy at the hardware store for advice on picking out a floor levelling compound. Don't tell him why, though, or he'll try to sell you a new counter.
I don't really recommend this for covering any other counter surface, like wood, ceramic tile (if it's really ugly, get it refinished instead, or if the grout is bad, clean it up and re grout it.), or bare particleboard. If it's wood, you'll get weird water damage issues, and that is a whole other kettle of fish.
Things I've learned about non-standard uses for sticky-tiles:
Okay, now to paint choices for cabinets:
My cabinets are steel 1950's cabinets. Paint choices for these don't necessarily apply to wood or melamine cabinets. If you have non-metal cabinets ask someone at the paint store for advice. There are special paints for melamine, for example.
I used appliance epoxy spray paint for the doors, except for the red ones. I'm not very happy with how the red ones turned out and may take them down and re-paint them with a different, more durable, even paint. What I used was regular safety red (fire engine red) spray paint, and I'm probably going to re-do them with tractor spray paint (not as good for my purposes as appliance epoxy, but comes in more colors).
The matte black paint on the cabinets is brush- or roll-on chalkboard paint, and it comes in a can, which was necessary as I wasn't going to be able to move the cabinets outside to repaint them (when they come down, they're going AWAY and period-appropriate ones are going up in their places). I just took the drawers and doors out for painting in the contrast colors. I understand that you can use this paint in nearly any surface as long as it's prepared correctly, which means sanding it smooth (but not too smooth), filling any dents, and re sanding to smooth it and allow the paint to stick properly (that's a from-memory summary of the surface prep instructions on the can). I used 3 coats, waiting until each coat was dry before putting up the next. It can cover in one coat, but I have kids, and wanted the surface to be durable. 1 quart did all my cabinets and left me enough to do part of the wall for another chalkboard.
If you have an old appliance (like a stove or fridge) that is chipped or in a weird color, appliance epoxy is the stuff you need to refinish it. However, stoves require high-temp paint on the cooking surface, and that comes only in matte black, silver, white and cream, so keep that in mind when you are planning to refinish one, and figure out how you want the overall look to work before you buy paint.
Now, I shall return to feeling sorry for myself about my apparent ear infection.
Sticky tiles on counter as a temporary face lift atop hideous old Formica until real money/real remodelling comes along:
I've done this in my mom's kitchen and mine (both are temporary!!! and will need to be replaced in a few years), and for both projects I used the stone-textured tiles that are fairly rigid. They cut with a razor knife, just like the thinner/cheaper ones, but take a bit more effort (and a straight edge - like a counter top edge- to snap them over) to snap.
Teh best advice I can give is to make sure your counter is CLEAN and smooth (I had to mount that molding on the edge and shim underneath to make my 3 independent counter sections contiguous and smooth enough to tile). The tiles will stick best to Formica if it's not bubbled, chipped or damaged. If the counter is damaged/chipped/has an uneven surface, ask the floor guy at the hardware store for advice on picking out a floor levelling compound. Don't tell him why, though, or he'll try to sell you a new counter.
I don't really recommend this for covering any other counter surface, like wood, ceramic tile (if it's really ugly, get it refinished instead, or if the grout is bad, clean it up and re grout it.), or bare particleboard. If it's wood, you'll get weird water damage issues, and that is a whole other kettle of fish.
Things I've learned about non-standard uses for sticky-tiles:
- Don't use sticky tiles on vertical surfaces unless there is something supporting them from the bottom (like mouldings), unless you want to have to go back and glue them in place with E-6000 in 3-6 months (or on any hot day). My mom has a few vertically placed tiles that slipped for 2 reasons (no primer and no support) which we have had to re-mount. All the tiles on my walls in my kitchen that I was lazy about (i.e. walked away from the job half-finished because I've been really ADD about this house) and did not support with mouldings have slipped because the house wasn't air-conditioned this summer, and I have to re-mount them when I get the mouldings put up. The ones that were supported are fine.
- If you do have to remount, use E-6000. It works really well. Spread it thin. If the tile is reluctant to be remounted, tape it up with masking tape while you wait for it to set. Alternatively, use a contact-type cement (whatever type you are comfortable with).
- If you put tiles on vertical surfaces, use the thinner/cheaper kinds of tile (heavier tiles will slip even if the adhesive is good), but don't go with a discount brand, as the adhesive is different and not as secure. I'd avoid them for any surface or use, really, as they tend to slip or peel up no matter what.
- ALWAYS use the latex surface primer for applying sticky tile, as it really improves the adhesion.
Okay, now to paint choices for cabinets:
My cabinets are steel 1950's cabinets. Paint choices for these don't necessarily apply to wood or melamine cabinets. If you have non-metal cabinets ask someone at the paint store for advice. There are special paints for melamine, for example.
I used appliance epoxy spray paint for the doors, except for the red ones. I'm not very happy with how the red ones turned out and may take them down and re-paint them with a different, more durable, even paint. What I used was regular safety red (fire engine red) spray paint, and I'm probably going to re-do them with tractor spray paint (not as good for my purposes as appliance epoxy, but comes in more colors).
The matte black paint on the cabinets is brush- or roll-on chalkboard paint, and it comes in a can, which was necessary as I wasn't going to be able to move the cabinets outside to repaint them (when they come down, they're going AWAY and period-appropriate ones are going up in their places). I just took the drawers and doors out for painting in the contrast colors. I understand that you can use this paint in nearly any surface as long as it's prepared correctly, which means sanding it smooth (but not too smooth), filling any dents, and re sanding to smooth it and allow the paint to stick properly (that's a from-memory summary of the surface prep instructions on the can). I used 3 coats, waiting until each coat was dry before putting up the next. It can cover in one coat, but I have kids, and wanted the surface to be durable. 1 quart did all my cabinets and left me enough to do part of the wall for another chalkboard.
If you have an old appliance (like a stove or fridge) that is chipped or in a weird color, appliance epoxy is the stuff you need to refinish it. However, stoves require high-temp paint on the cooking surface, and that comes only in matte black, silver, white and cream, so keep that in mind when you are planning to refinish one, and figure out how you want the overall look to work before you buy paint.
Now, I shall return to feeling sorry for myself about my apparent ear infection.
10 September 2006
Progressions, Plans and a Thing In The Attic
So, it's Autumn, we've owned our home for 6 months (only 6? it feels like an eternity), and we've made some small progress. There's paint in the hallway now, a "Very Craftsman" green, according to Mom, and I'm working my way around the dining room. We've got all the floors clean of hideous carpet, though some are a little scarred from the experience. The living room is done, save for scouring the floor to remove the last of the carpet pad, and I've got a lovely play area set up for my older son to use while we work. The bath is half tiled, and the master bedroom still languishes, but at least there's a light in there. Things are moving along, if slowly.
I'm aiming for Hallowe'en as our move-in goal.
I have made some sketches of what I'm doing with parts of the house. My plan for the dining room bay is to take this:
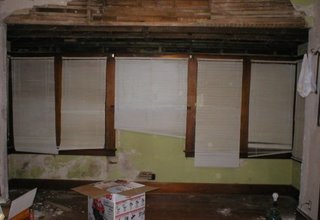
The dining room bay as it appears now.
And turn it into this:
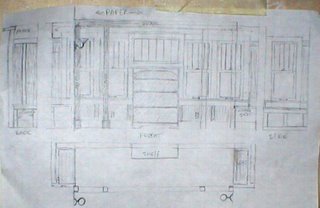
I made the sketch without looking at the bay so I misdrew the windows - they actually cover the full width of the bay. Other than that, it's spot on. The posts are structural, not just cosmetic. They will support the poorly-remodeled wall cutout on a 4x4 beam, and we've got plenty of mouldings to wrap them with, to make them look Really Original. Eventually, I'd like to add cosmetic ceiling beams to the dining room, too, but this comes first.
The bookshelf is actually a family heirloom, which belonged to my paternal grandmother. It's going to be mounted permanently to the wall, and there will be wainscot added around it, right up to the vertical posts at the corners. It'll be the same as the panelling in the "built-in" I made to fill the arch.
The window seats will be made of the salvageable parts of the old living room archway double doors, which apparently sat unloved for many years in some leaky place. The bottoms have completely rotted, leaving me with a nifty, but not reusable, item. I decided (since I can't replace them where they belong, and because I want to make them again a part of the house), to make window seats of them. Also, the bay is only 4 feet wide, the ends are not evenly deep, and that space is nearly wasted. Finally, it is because I have really fond memories of the enormous window seat in the dining room of my parents' craftsman bungalow when I was a kid. Nothing like curling up in a sunny window with a good book. I want my kids to have that.
Speaking of kids, I'm still working on FX's room. When last I posted about it, we were here:
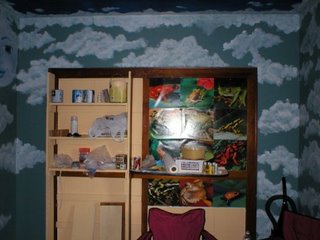
There are a few more shelves in the bookshelf, but it pretty much still looks this way now.
And we (which really means "I") plan to finish it thusly:
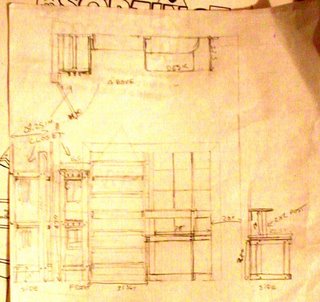
That's going to be an open closet with coat hooks on the outside, and shelves for shoes. The closet will have an upper and lower level, the upper one being for things he wears every once in a while (Sunday or seasonal clothes) and the lower being for his school clothes. The desk in the plans is all cut out, but not assembled.
Now to the progress. Quite a bit has been done, some has even been reported, none has been photographed ... Until now!

The Very Craftsman Green hallway.
That's just bare old plaster above the border. The frieze paper (really only by virtue of position - its only pattern is a sort of golden parchment look) goes up after the whole dining room and hallway are painted, and really will look more like an intended plaster finish similar to what's there now, but without the obvious patches and old mucilage. I love how the border paper looks, even if it's only tacked up.
The dark green will make a lovely background for two paintings, done by my cousin, that I was given. You can see one if them in the photo of the living room:
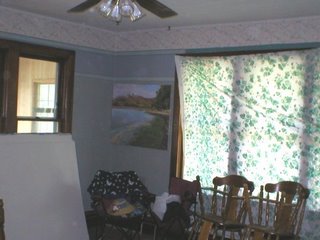
It'll be nice when there's furniture in it. Not lawn furniture.
I love that vintage Greek key paper, but there wasn't quite enough. I have to make some more, which will involve printing it on archival quality paper and pasting it up. It's always something :)
Now, the floor. Here, you can see the line of demarcation between the dining room and living room where the two different carpets once laid edge-to-edge:
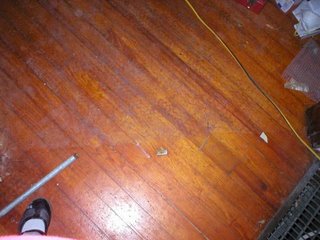
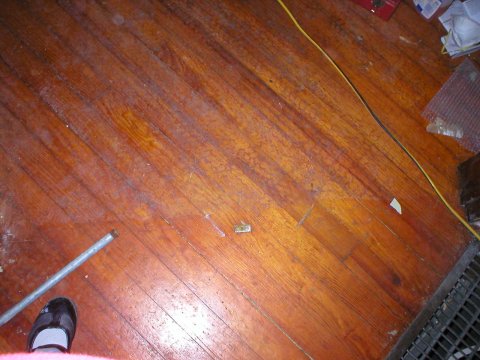
Seamy, Isn't it?
Yes, I figure they didn't strip off the old wax prior to laying down a pink rubber carpet pad however umpteen years ago, so when the pad degraded, it bonded to the old wax, leaving ... this. This is after scraping for two days. I'll keep you posted on the scrubbing and what works. Once it's scrubbed, I'm waxing it.
Call me old-fashioned, or call me masochistic - we do have 2 kids and a dog - I like waxed floors, even if I know what it takes to keep them up.
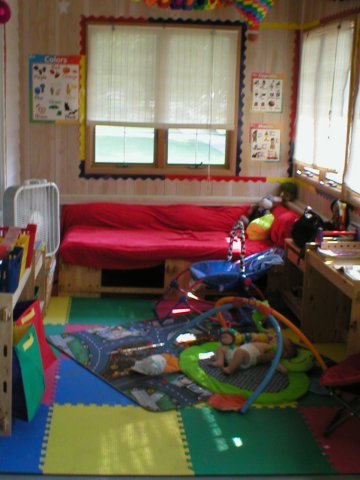
And now for the playroom:
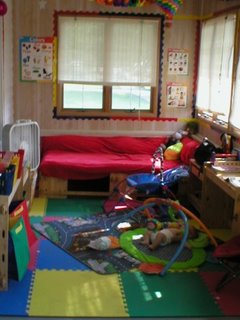
It's not perfect, but it's a nice, bright, stimulating environment for a 3 year old boy. And he loves it, which is what counts.
On to the half-tiled bath. First, a before picture is in order:

It was very pink, and plastic, in there.
Now, we have this:
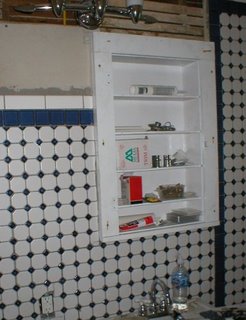
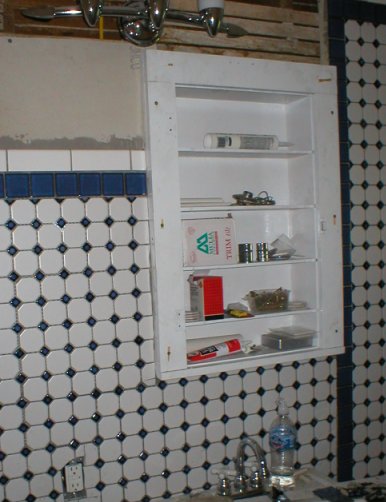
That's the "fixture wall" with the new/old medicine cabinet in it, sans door.
We were lucky enough to find the old girl under the dining room bay, and she's sound, so I painted her and in she went. The mirrored door is in the kitchen until we're all done flinging heavy stuff around in the bathroom. I wish I had time to finish in there right now, but I don't.
And the master bedroom currently houses all the salvaged lumber, mouldings, doors and panelling:
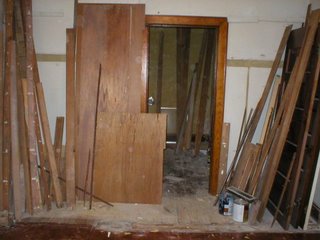
Sad, isn't it? Eventually, we will have to sleep in here.
Finally, we come to The Thing in the Attic:
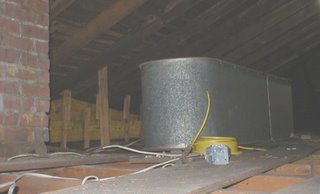
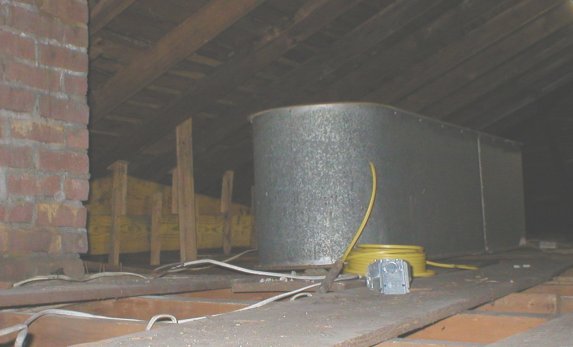
The Titanic, or our cistern.
A few months back, when I wasn't allowed up on ladders, my friend K stuck her head up in the attic where her husband J had been working to look for a tool we needed (we were demoing something), and said: "Hey! There's some kind of wash tub up here!"
I, of course, pictured a round tin tub, with handles, like the sort that get sold for icing down beers, and thought "Cool! I could use that for something."
Many weeks later, I stick my own head up there and see this HUGE bathtub shaped thing, about 4 feet wide and maybe 8 or 9 feet long, and a good 4 feet high. It must be the old water-pressurizing cistern, and must have been in here since the place was built. The way these things worked was that you'd pump water up here from the well, by hand, and it would sit up here until you turned on the taps, which would give you water pressure, like a water tower. It certainly goes a long way toward explaining some of the odd plumbing in the basement.
Now, what are we going to do with it if we ever decide to finish the attic?
I'm aiming for Hallowe'en as our move-in goal.
I have made some sketches of what I'm doing with parts of the house. My plan for the dining room bay is to take this:

The dining room bay as it appears now.
And turn it into this:

I made the sketch without looking at the bay so I misdrew the windows - they actually cover the full width of the bay. Other than that, it's spot on. The posts are structural, not just cosmetic. They will support the poorly-remodeled wall cutout on a 4x4 beam, and we've got plenty of mouldings to wrap them with, to make them look Really Original. Eventually, I'd like to add cosmetic ceiling beams to the dining room, too, but this comes first.
The bookshelf is actually a family heirloom, which belonged to my paternal grandmother. It's going to be mounted permanently to the wall, and there will be wainscot added around it, right up to the vertical posts at the corners. It'll be the same as the panelling in the "built-in" I made to fill the arch.
The window seats will be made of the salvageable parts of the old living room archway double doors, which apparently sat unloved for many years in some leaky place. The bottoms have completely rotted, leaving me with a nifty, but not reusable, item. I decided (since I can't replace them where they belong, and because I want to make them again a part of the house), to make window seats of them. Also, the bay is only 4 feet wide, the ends are not evenly deep, and that space is nearly wasted. Finally, it is because I have really fond memories of the enormous window seat in the dining room of my parents' craftsman bungalow when I was a kid. Nothing like curling up in a sunny window with a good book. I want my kids to have that.
Speaking of kids, I'm still working on FX's room. When last I posted about it, we were here:
There are a few more shelves in the bookshelf, but it pretty much still looks this way now.And we (which really means "I") plan to finish it thusly:

That's going to be an open closet with coat hooks on the outside, and shelves for shoes. The closet will have an upper and lower level, the upper one being for things he wears every once in a while (Sunday or seasonal clothes) and the lower being for his school clothes. The desk in the plans is all cut out, but not assembled.
Now to the progress. Quite a bit has been done, some has even been reported, none has been photographed ... Until now!
The Very Craftsman Green hallway.That's just bare old plaster above the border. The frieze paper (really only by virtue of position - its only pattern is a sort of golden parchment look) goes up after the whole dining room and hallway are painted, and really will look more like an intended plaster finish similar to what's there now, but without the obvious patches and old mucilage. I love how the border paper looks, even if it's only tacked up.
The dark green will make a lovely background for two paintings, done by my cousin, that I was given. You can see one if them in the photo of the living room:
It'll be nice when there's furniture in it. Not lawn furniture.I love that vintage Greek key paper, but there wasn't quite enough. I have to make some more, which will involve printing it on archival quality paper and pasting it up. It's always something :)
Now, the floor. Here, you can see the line of demarcation between the dining room and living room where the two different carpets once laid edge-to-edge:
Seamy, Isn't it?Yes, I figure they didn't strip off the old wax prior to laying down a pink rubber carpet pad however umpteen years ago, so when the pad degraded, it bonded to the old wax, leaving ... this. This is after scraping for two days. I'll keep you posted on the scrubbing and what works. Once it's scrubbed, I'm waxing it.
Call me old-fashioned, or call me masochistic - we do have 2 kids and a dog - I like waxed floors, even if I know what it takes to keep them up.
And now for the playroom:

It's not perfect, but it's a nice, bright, stimulating environment for a 3 year old boy. And he loves it, which is what counts.
On to the half-tiled bath. First, a before picture is in order:
Now, we have this:
That's the "fixture wall" with the new/old medicine cabinet in it, sans door. We were lucky enough to find the old girl under the dining room bay, and she's sound, so I painted her and in she went. The mirrored door is in the kitchen until we're all done flinging heavy stuff around in the bathroom. I wish I had time to finish in there right now, but I don't.
And the master bedroom currently houses all the salvaged lumber, mouldings, doors and panelling:
Sad, isn't it? Eventually, we will have to sleep in here.Finally, we come to The Thing in the Attic:
The Titanic, or our cistern.A few months back, when I wasn't allowed up on ladders, my friend K stuck her head up in the attic where her husband J had been working to look for a tool we needed (we were demoing something), and said: "Hey! There's some kind of wash tub up here!"
I, of course, pictured a round tin tub, with handles, like the sort that get sold for icing down beers, and thought "Cool! I could use that for something."
Many weeks later, I stick my own head up there and see this HUGE bathtub shaped thing, about 4 feet wide and maybe 8 or 9 feet long, and a good 4 feet high. It must be the old water-pressurizing cistern, and must have been in here since the place was built. The way these things worked was that you'd pump water up here from the well, by hand, and it would sit up here until you turned on the taps, which would give you water pressure, like a water tower. It certainly goes a long way toward explaining some of the odd plumbing in the basement.
Now, what are we going to do with it if we ever decide to finish the attic?
01 August 2006
The Clock is Ticking
We are supposed to be moved in, at least enough to to consider ourselves to be residing in our house, by the time my older son returns from Texas. We have until the 9th.
Tick, tick, tick...
Understandably, between this and the heatwave, I've stopped sleeping. I decided, therefore, to get out of bed at 4 am and go paint my living room. It seemed like a ggod idea, and lo, by 8 am, there was a successful paintjob, even if I had to stop and patch a couple of cracks I hadn't fixed yet, mid-painting. Our living room now only requires the border papers (2 hours) and removal of the Vile Pea-Green Shag Carpet (however long it takes, I'll enjoy every ripping, wrenching moment).
It already looks Really Nice. The greys I picked really set off the cherry-stained woodwork, and the wood floor, once completely revealed, should just make it that much more wonderful.
tick
I still have work to do on the bath, but it should be in its temporary usable stage by Thursday night. Toilet, sink, tub, cheap plastic temporary flooring... Not lovely, but a place to go. A water-resistant place, at least, and that's always an improvement.
tick
I've decided to just Make Do with our bedroom. I can re-hang the window skirting board, patch what needs patching, and paint, paint, paint. We have Way Too Much To Do left to really make this livable before moving in (like patching in the floorboards where the curtain wall was, finishing the raw flooring in the former closet, resetting the mouldings, and pulling down the boards the acoustic tiels were stapled to) to worry about things like scraping out two rooms worth of hideous layered wallpaper. Unless it comes down Very Easily. I already pulled up the carpet, but put iback down to protect the floor from our construction.
tick
I Really Must finish the painting in the kitchen, for safety reasons. There's the old flaky wall that I'm still only halfway through scrubbing with a wire brush, which also needs patching (natch) as well as painting afterwards.
tick
Then, we have our Fabulous Debris Collection. It's been preventing work on the dining room (we won't even go there - we plan to get that mostly done AFTER number one son comes home) and the porch (which, mercifully, needs little work done) for two months. The dumpster finally arrives tomorrow morning. I await its appearance with ... cynicism. There's a reason we've been collecting debris for months, and it was a dumpster shortage. I really do hope we can get it, though.
Tick, tick, tick...
Tick, tick, tick...
Understandably, between this and the heatwave, I've stopped sleeping. I decided, therefore, to get out of bed at 4 am and go paint my living room. It seemed like a ggod idea, and lo, by 8 am, there was a successful paintjob, even if I had to stop and patch a couple of cracks I hadn't fixed yet, mid-painting. Our living room now only requires the border papers (2 hours) and removal of the Vile Pea-Green Shag Carpet (however long it takes, I'll enjoy every ripping, wrenching moment).
It already looks Really Nice. The greys I picked really set off the cherry-stained woodwork, and the wood floor, once completely revealed, should just make it that much more wonderful.
tick
I still have work to do on the bath, but it should be in its temporary usable stage by Thursday night. Toilet, sink, tub, cheap plastic temporary flooring... Not lovely, but a place to go. A water-resistant place, at least, and that's always an improvement.
tick
I've decided to just Make Do with our bedroom. I can re-hang the window skirting board, patch what needs patching, and paint, paint, paint. We have Way Too Much To Do left to really make this livable before moving in (like patching in the floorboards where the curtain wall was, finishing the raw flooring in the former closet, resetting the mouldings, and pulling down the boards the acoustic tiels were stapled to) to worry about things like scraping out two rooms worth of hideous layered wallpaper. Unless it comes down Very Easily. I already pulled up the carpet, but put iback down to protect the floor from our construction.
tick
I Really Must finish the painting in the kitchen, for safety reasons. There's the old flaky wall that I'm still only halfway through scrubbing with a wire brush, which also needs patching (natch) as well as painting afterwards.
tick
Then, we have our Fabulous Debris Collection. It's been preventing work on the dining room (we won't even go there - we plan to get that mostly done AFTER number one son comes home) and the porch (which, mercifully, needs little work done) for two months. The dumpster finally arrives tomorrow morning. I await its appearance with ... cynicism. There's a reason we've been collecting debris for months, and it was a dumpster shortage. I really do hope we can get it, though.
Tick, tick, tick...
29 July 2006
We're Different Here
Some girls call Mom for cooking advice; "Hi, Mom? What makes your gravy taste so good?"
I call home for ... help with obscure restoration and construction techniques; "Hi, Mom? Did we buy the right kind of mortar for this job? The label says..."
We're definitely a bit on the odd side.
In other news, the plumbing revisions are Just About Done. We expect to have the bath ready for fixtures tonight - And the water back on! It's essentially waiting on me, as I have to finish mounting the tilebacker boards before we can do things like putting the toilet back.
The plumbing revisions include, by the way, repair/replacement of the scary rubber hose that formed part of the kitchen sink waste pipe, and relocation of the showerhead to point above my husband's when the tub basin height is calculated in.
It's progress, and I'm not sure I trust it. Don't pinch me - I don't want to wake up.
I call home for ... help with obscure restoration and construction techniques; "Hi, Mom? Did we buy the right kind of mortar for this job? The label says..."
We're definitely a bit on the odd side.
In other news, the plumbing revisions are Just About Done. We expect to have the bath ready for fixtures tonight - And the water back on! It's essentially waiting on me, as I have to finish mounting the tilebacker boards before we can do things like putting the toilet back.
The plumbing revisions include, by the way, repair/replacement of the scary rubber hose that formed part of the kitchen sink waste pipe, and relocation of the showerhead to point above my husband's when the tub basin height is calculated in.
It's progress, and I'm not sure I trust it. Don't pinch me - I don't want to wake up.
06 July 2006
Dancing Idiot has a Baby. Film at 11.
Well, I'm now off bedrest - the baby is here. James Edward was born Jume 17th at 2 am on the dot, preceded by much screaming and accompanied by a great deal of relief. He's doing great, and so am I ... now.
It's been almost 3 weeks since then and I've finally gotten back into the house (first because of the bedrest and then the postpartum healing/in-law visits) to do a bit of work. I did actually get a few things done this afternoon, between removing the old storm door from what is now an interior doorway and wandering around the house a lot. I also got some progress made on my older son's bedroom murals, after discovering that the midnight blue mismix we bought for his ceiling had been mismarked, too. It's lavender. I guess I can figure out a use for a pint of lavender paint, but I was thwarted in my plans for the day.
"Oh, poor me, I'll have to go to the home store again for supplies. Whatever shall I do?"
Also, our sainted freind and electrical engineer J got the wiring/box/etc in place for the power company to come in and do the meter and service upgrade. That's tomorrow. I'm doing a happy dance, but that doesn't translate well in print. This is a good thing, as I look like an idiot - a happy idiot, but an idiot nonetheless.
The bad: we've discovered that the drainpipe from the kitchen sink needs replacement, in a rather unfortunate way - it fell off. Well, better to have found that out before we do all the other plumbing work, no? We plan to do that stuff next week, and I think we can fit a bit more PVC pipe into the budget. We'll have to, or no move-in before FX gets back from visiting our relations in Texas.
It's been almost 3 weeks since then and I've finally gotten back into the house (first because of the bedrest and then the postpartum healing/in-law visits) to do a bit of work. I did actually get a few things done this afternoon, between removing the old storm door from what is now an interior doorway and wandering around the house a lot. I also got some progress made on my older son's bedroom murals, after discovering that the midnight blue mismix we bought for his ceiling had been mismarked, too. It's lavender. I guess I can figure out a use for a pint of lavender paint, but I was thwarted in my plans for the day.
"Oh, poor me, I'll have to go to the home store again for supplies. Whatever shall I do?"
Also, our sainted freind and electrical engineer J got the wiring/box/etc in place for the power company to come in and do the meter and service upgrade. That's tomorrow. I'm doing a happy dance, but that doesn't translate well in print. This is a good thing, as I look like an idiot - a happy idiot, but an idiot nonetheless.
The bad: we've discovered that the drainpipe from the kitchen sink needs replacement, in a rather unfortunate way - it fell off. Well, better to have found that out before we do all the other plumbing work, no? We plan to do that stuff next week, and I think we can fit a bit more PVC pipe into the budget. We'll have to, or no move-in before FX gets back from visiting our relations in Texas.
15 April 2006
Kitchen! I am the Sticky-tile Empress!
What is she going on about? I'm really good at doing things with sticky tile (self-stick vinyl tiles for the normal people reading), many of which sticky tile was never intended to do. I've done my grandmother's bathroom, in such a way that it looks like we spent FAR more than 100 bucks on it. Mosaic, fancy cuts, etc. I get crazy with the stuff. It's wonderful when you want something to be temporarily livable/pretty until you can do the real renovations, and you've got a small budget.
Anyway, I stuck it to the Awful Tileboard in our kitchen toady, and to the Hideous Vomit-and-Cream Formica counter, as well as to our floor. The floor was fairly normal and straightforward, and has come out BEAUTIFULLY. Here we have photos of my kitchen cabinets, just about complete:
That's the temporary, cheeeeep new countertop solution: heavy-duty sticky tile, with a couple of painted strips of mdf stop moulding.
It looked so sexy I had to get our new knives out (housewarming gift to ourselves) and make them pose against it.
And this is what the counter looked like prior to covering it up. Yes, it is in 3 pieces, for no apparent reason. I stabilized it with the painted moulding strips prior to attaching Ye Olde Sticky Tile. It came out great.
I must, at this point, add that I am Very Impressed with the latex surface primer suggested by some nice sales monkey at one of the big home-improvement stores we've haunted recently. It DOES actually help the tiles adhere. VERY WELL - so well, in fact, that there will be no repositioning of tiles. If you screw up, scrape the tile up and get a new one out. This means that my normally non-feasible technique of covering up hideous formica tileboard (done it before, natch) with sticky tiles is now much more practical.
Also here is a preview of my plans for the sink cabinet:
This will, of course require Even More Paint, plus more sticky tiles (I have those) and I have to make another trip to the hardware store to buy the right size nylon washers (so I can replace the drawer slide roller wheels and my drawers will hang straight). It's SOOOO obviously a mockup, but that still looks better than what's there.
You may have noticed some of the doors hanging open, above. There's a reason. The closure springs are mostly gone. A question, for anyone who may be reading this: Do you know of a source for replacement hinge-spring assemblies for old steel cabinets? I'm fairly good at research, but this has me stumped.
Anyway, I stuck it to the Awful Tileboard in our kitchen toady, and to the Hideous Vomit-and-Cream Formica counter, as well as to our floor. The floor was fairly normal and straightforward, and has come out BEAUTIFULLY. Here we have photos of my kitchen cabinets, just about complete:
I must, at this point, add that I am Very Impressed with the latex surface primer suggested by some nice sales monkey at one of the big home-improvement stores we've haunted recently. It DOES actually help the tiles adhere. VERY WELL - so well, in fact, that there will be no repositioning of tiles. If you screw up, scrape the tile up and get a new one out. This means that my normally non-feasible technique of covering up hideous formica tileboard (done it before, natch) with sticky tiles is now much more practical.
Also here is a preview of my plans for the sink cabinet:
This will, of course require Even More Paint, plus more sticky tiles (I have those) and I have to make another trip to the hardware store to buy the right size nylon washers (so I can replace the drawer slide roller wheels and my drawers will hang straight). It's SOOOO obviously a mockup, but that still looks better than what's there.
You may have noticed some of the doors hanging open, above. There's a reason. The closure springs are mostly gone. A question, for anyone who may be reading this: Do you know of a source for replacement hinge-spring assemblies for old steel cabinets? I'm fairly good at research, but this has me stumped.
09 April 2006
House Rehab Illustrated
I finally remembered to bring the camera. Included herein are images of the kitchen, so far; before/after images of the front door; some cool Basement Archaeology shots; and other things, with my typical boring narration. Oh, and please pardon our dust and construction debris. Everywhere.
And Now, to the Pictures!
First, the kitchen, before:
Bleh. Notice the grimy blue carpet. It's glued down ... with wood glue.
and so far:
The cabinets are being painted flat black (blackboard paint), with silver lower doors, and Safety Red drawers and upper doors. I cleaned the chromed handles, which are all the same for the main bank of cabinets (BTW, magic eraser sponges work great for this, with a bit of degreaser for the greasy parts - my friend K. thought I had replated them!), then picked out the six most worn ones and sprayed them black with epoxy paint. Those six went on the matte silver doors, and the cleaned chrome ones look wonderful against the red painted drawers.
We plan to do the same to the sink cabinet, but it involves a bit more work to take apart. Plus we need to buy more paint...
I am really loving how the cheapo sticky tiles are making the old floor look larger. It's not ideal, and not period to the house, but we'll have a kitchen we can enjoy until we can do better.
And now, the Original Front Door (now the living room interior door), with Icky Kwiky goldtone lockset:
and without:
The paint is pretty bad, yes, but cleaning the hardware and making it pretty can wait until we're in the house. Removing the offending modern lockset prior to moving in could not wait. And it still looks better than it did.
I'm no Indiana Jones, but I did discover some cool stuff in the cellar.
For example, when you look up and you aren't busy being terrified by Horrible Old Wiring, you can find some bizarre things, like an old Esso sign being used to fit the new ductwork under the original coal furnace heat vent:
Plus, I think the part that was cut out is leaning against a wall elsewhere. Neat.
Now, I know it's not cellar related, but do you remember these?
They are the access panels for the bathroom plumbing. Which has no cutoff valves. None. Zip. Nada. I have no idea why you need access panels if you have no cutoff valves. Yes, they are on our to-do list.
Anyway, those panels? They're made of another old sign:
I think the rest of it has been used to make the interior cellar door solid, and that's a whole entry all by itself. Anyway, get a load of the name - "Critic Feeds" :D
Back to creeping around in the basement. I stuck the camera through a hole I punched in the plastic stapled over the access to the foundation of the dining room bay, adn I took some photos, to see what was there.
I found an old porch swing and some mouldings:
God knows if that thing can be saved, but it's pretty cool to find it at all.
and what probably happened to parts of the original kitchen cabinets:
Yep, that's what they are. I don't think they are salvageable. Makes you sad, too, doesn't it? At least I will have references to use when we do get around to doing the Big Kitchen Renovation.
And finally, to close, here's a couple of images of the old (but not original) coal furnace:
It's still hooked up to the flue, but obviously hasn't been used for decades. That first photo is its tag, which is on the back. It's probably a 1930's model, judging from the styling.
More photos later, but this is a good start. I still haven't found any stamping, but I'm too pregnant to fit through the attic access panel, which is where i'm most liekly to find marks.
And Now, to the Pictures!
First, the kitchen, before:
Bleh. Notice the grimy blue carpet. It's glued down ... with wood glue.
and so far:
The cabinets are being painted flat black (blackboard paint), with silver lower doors, and Safety Red drawers and upper doors. I cleaned the chromed handles, which are all the same for the main bank of cabinets (BTW, magic eraser sponges work great for this, with a bit of degreaser for the greasy parts - my friend K. thought I had replated them!), then picked out the six most worn ones and sprayed them black with epoxy paint. Those six went on the matte silver doors, and the cleaned chrome ones look wonderful against the red painted drawers.
We plan to do the same to the sink cabinet, but it involves a bit more work to take apart. Plus we need to buy more paint...
I am really loving how the cheapo sticky tiles are making the old floor look larger. It's not ideal, and not period to the house, but we'll have a kitchen we can enjoy until we can do better.
And now, the Original Front Door (now the living room interior door), with Icky Kwiky goldtone lockset:
and without:
The paint is pretty bad, yes, but cleaning the hardware and making it pretty can wait until we're in the house. Removing the offending modern lockset prior to moving in could not wait. And it still looks better than it did.
I'm no Indiana Jones, but I did discover some cool stuff in the cellar.
For example, when you look up and you aren't busy being terrified by Horrible Old Wiring, you can find some bizarre things, like an old Esso sign being used to fit the new ductwork under the original coal furnace heat vent:
Plus, I think the part that was cut out is leaning against a wall elsewhere. Neat.
Now, I know it's not cellar related, but do you remember these?
Anyway, those panels? They're made of another old sign:
I think the rest of it has been used to make the interior cellar door solid, and that's a whole entry all by itself. Anyway, get a load of the name - "Critic Feeds" :D
Back to creeping around in the basement. I stuck the camera through a hole I punched in the plastic stapled over the access to the foundation of the dining room bay, adn I took some photos, to see what was there.
I found an old porch swing and some mouldings:
and what probably happened to parts of the original kitchen cabinets:
Yep, that's what they are. I don't think they are salvageable. Makes you sad, too, doesn't it? At least I will have references to use when we do get around to doing the Big Kitchen Renovation.
And finally, to close, here's a couple of images of the old (but not original) coal furnace:
More photos later, but this is a good start. I still haven't found any stamping, but I'm too pregnant to fit through the attic access panel, which is where i'm most liekly to find marks.
Subscribe to:
Posts (Atom)