30 May 2007
02 May 2007
A Weighty Task
Spring has sprung. It's hot. But not really hot enough for air conditioners, unless we don't open the windows. Which, mostly wasn't possible, so we had to borrow an a/c unit from my mother. I'm putting screens into the storm windows right and left, but getting all the windows open, and keeping them that way is a nightmare. We ran out of short pieces of wood.
What's wrong with the windows, you might ask? You didn't ask. Well, I'll ask for you, in the interest of moving us all along.
The windows are quite well preserved, except for a couple in the dining room bay, but nearly all the sash cords have gone. All but one set, on the only window that apparently never got sunbaked. That window has been open for weeks, since it's now indoors, on both sides, and opening it does us no good. I replaced a set of cords in my son's bedroom, and I think I replaced a set in the back room (hereafter referred to as the Hole, until it's cleared and made into the dressing room), last summer.
Some progress, but not enough. No openable windows in, say, the kitchen, or the dining room, or the living room. We had used up the little bits of wood propping open our bedroom windows. So sleeping was possible. It was unbearable, even with fans everywhere, and mom's little borrowed a/c unit. Too hot.
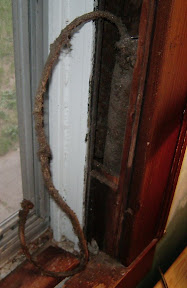
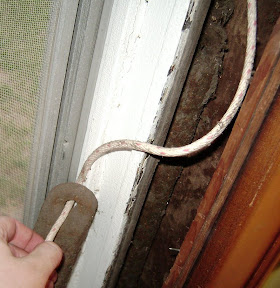
So, I started the interminable task of pulling out bottom sashes and prying out access boards yesterday. I started with the other window in my son's room, so he could get actual cross-ventilation, and while I was working on it, I decided to take photos. For everyone else, of course. I really don't need a picture of this to remember it:What's wrong with the windows, you might ask? You didn't ask. Well, I'll ask for you, in the interest of moving us all along.
The windows are quite well preserved, except for a couple in the dining room bay, but nearly all the sash cords have gone. All but one set, on the only window that apparently never got sunbaked. That window has been open for weeks, since it's now indoors, on both sides, and opening it does us no good. I replaced a set of cords in my son's bedroom, and I think I replaced a set in the back room (hereafter referred to as the Hole, until it's cleared and made into the dressing room), last summer.
Some progress, but not enough. No openable windows in, say, the kitchen, or the dining room, or the living room. We had used up the little bits of wood propping open our bedroom windows. So sleeping was possible. It was unbearable, even with fans everywhere, and mom's little borrowed a/c unit. Too hot.
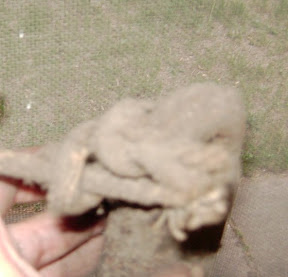
Yum. It's like a big metal poop, but covered with 80 years of dust and dead spiders. Just makes you want to do this, doesn't it? Actually, looking at this, you can kind of see why people just quit replacing the cords.
Let's start at the beginning. It's much less disgusting.
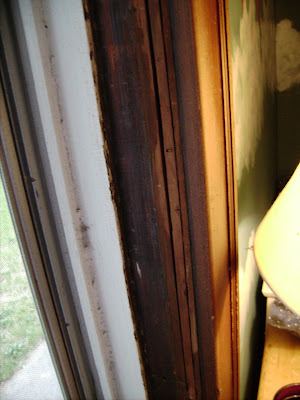
These instructions are for a "modern" house with repair access ports designed into the frames. You can tell if you have these by opening the window and looking for joints and/or screws in the tracks. Also, even though all our windows are double-hung, the upper sashes are painted into place and their cords are (unsurprisingly, as they were protected from the sun) in fine shape, so we're only working with the lower, inner sash and its cords. Pulling both sashes, stripping and restoring full sash movement is a whole other kettle of lead paint chips.
If you have a house that doesn't have this modern convenience added to the traditional double-hung window, you'll have to pull the trim to access the channels.
Get real replacement sash cords, not nylon (or any other synthetic rope - it won't hold the knots well at all) or cheap cotton cord (not strong enough). It's fairly high-test, and is treated with a very grabby sizing to help it keep the knots. You'll also need a hammer, a large flathead screwdriver or small prybar, a screwdriver for removing and replacing any screws, and a cutting implement. Another thing you want is a long stiff piece of wire with an open hook at one end - a repurposed coathanger is perfect. More on this later.
First, pry off the stop moldings, gently, and set aside. If there is a single cord, or if you are replacing cord before it gives way, cut the cord now. Grasp the lower sash firmly and pull it straight out and set aside, somewhere you won't step into or kick it. I know you won't and you know you won't, but do you want add a trip to the hospital and the home store, plus recreational re-glazing to your day?
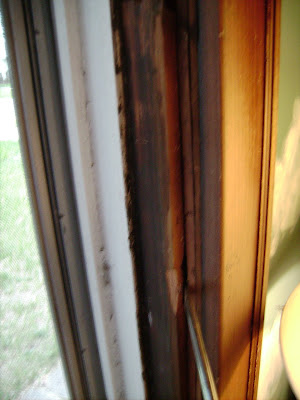
Now, if there are screws holding in the access panels, rather than just friction and the pressure of the stop molding, remove them and put them somewhere safe, like a cup. You'll probably find some evidence of previous repairs, as I did. Only two of the prymarks I left behind were mine - the other dozen were already there. Clearly the cords had been replaced before.
Start by prying carefully. There might be a small nail securing the panel (these are under the window trim, where they occur, at my house, which meant either pulling the trim -all of it- or hacksawing the nail). Remove or cut the nail, depending on your level of commitment. The edge that is secured by this mail occurs under the stop moldings at my house, so I just cut the nail. Continue prying gently until the panel pops out.

Let's start at the beginning. It's much less disgusting.
These instructions are for a "modern" house with repair access ports designed into the frames. You can tell if you have these by opening the window and looking for joints and/or screws in the tracks. Also, even though all our windows are double-hung, the upper sashes are painted into place and their cords are (unsurprisingly, as they were protected from the sun) in fine shape, so we're only working with the lower, inner sash and its cords. Pulling both sashes, stripping and restoring full sash movement is a whole other kettle of lead paint chips.
If you have a house that doesn't have this modern convenience added to the traditional double-hung window, you'll have to pull the trim to access the channels.
Get real replacement sash cords, not nylon (or any other synthetic rope - it won't hold the knots well at all) or cheap cotton cord (not strong enough). It's fairly high-test, and is treated with a very grabby sizing to help it keep the knots. You'll also need a hammer, a large flathead screwdriver or small prybar, a screwdriver for removing and replacing any screws, and a cutting implement. Another thing you want is a long stiff piece of wire with an open hook at one end - a repurposed coathanger is perfect. More on this later.
First, pry off the stop moldings, gently, and set aside. If there is a single cord, or if you are replacing cord before it gives way, cut the cord now. Grasp the lower sash firmly and pull it straight out and set aside, somewhere you won't step into or kick it. I know you won't and you know you won't, but do you want add a trip to the hospital and the home store, plus recreational re-glazing to your day?
Now, if there are screws holding in the access panels, rather than just friction and the pressure of the stop molding, remove them and put them somewhere safe, like a cup. You'll probably find some evidence of previous repairs, as I did. Only two of the prymarks I left behind were mine - the other dozen were already there. Clearly the cords had been replaced before.

Start by prying carefully. There might be a small nail securing the panel (these are under the window trim, where they occur, at my house, which meant either pulling the trim -all of it- or hacksawing the nail). Remove or cut the nail, depending on your level of commitment. The edge that is secured by this mail occurs under the stop moldings at my house, so I just cut the nail. Continue prying gently until the panel pops out.

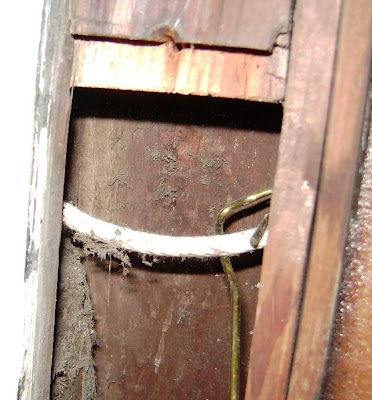
You may have to pull it out after the leading edge is free, since the center stop molding is still there. One edge is often under that. Once it's out, we get to do the fun part.

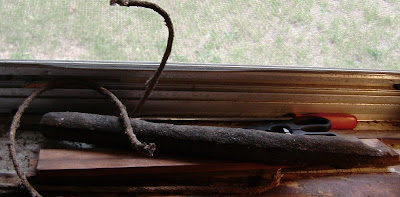
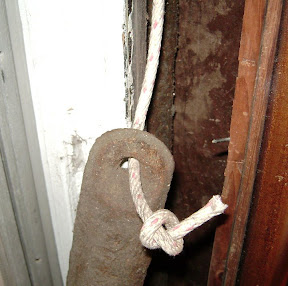
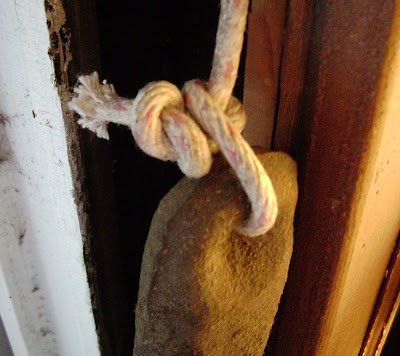
Deeee-lish-us. Reach in there and grab the weight and pull it out. Wear gloves if you like - our weights are iron, but as often, they can be lead. Look at the knot configuration, if you can. You probably can't, if it looks anything like the example weight does:

Let's wrestle that a little bit. This better? No?

Well, okay, I'll demonstrate the not-so-arcane-after-all knotting technique after we get the new cord through the pulley and out where we can reach it. Measure the length you'll need the cords - measure how far down the sash the cord groove goes, plus the length from the top of the pulley to the top of the weight (if you stood it up on the windowsill), and the cord should be long enough. Add three inches if you are worried.
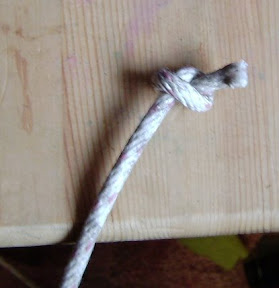
Tie a plain old half-hitch close to one end, and pull it as tight as you can.
If you are really lucky, the cord will just snake down the inside and fall out the opening. However, this is unlikely, so use that long wire hook to fish around up there and pull the cord through.
Tie a plain old half-hitch close to one end, and pull it as tight as you can.

Then thread the other end through the top of the pulley, push every bit through until you get to the knot.


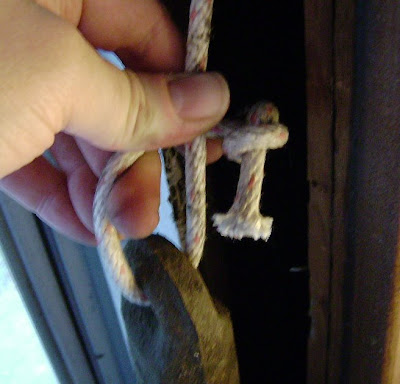
Take the end of the cord and thread it through the hole in the weight. You should have enough slack to do this pretty easily, but not so much that the weight can lie on the windowsill while you work. I propped the weight up in the outer slide channel and the worked fine.
Now, tie another firm half hitch close to the end.

Now, tie another firm half hitch close to the end.

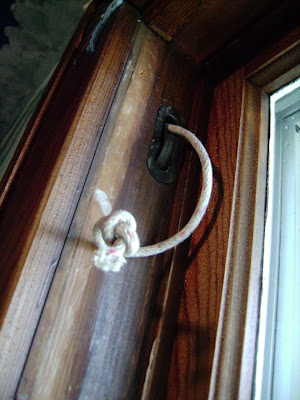
This would be the not-as-arcane-as-you-think knotting method. Next, pull the knot up, wrap it around the cord, and "button" it through the resulting loop. Step 1:

Step 2:
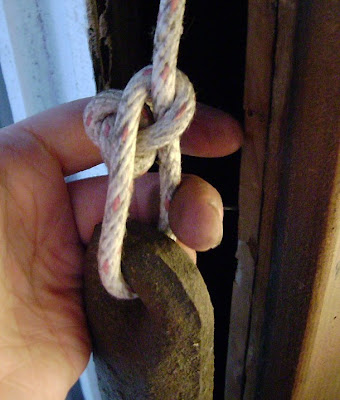

Then pull tight to secure it.

Put the weight back in the weight channel, and close up the access port. Repeat on the other side. Get the sash, and remove any remaining old cords from the cord grooves. Get another person to hold the sash (or prop it on something secure), make sure you've got the right side of the sash facing in, pull the knots down from the pulleys and tuck them into the holes for the knots, then push the cords into the grooves. The sash should now be hanging freely in the window, and shoudl slide easily up and down. Re-install the stop moldings (if you pulled the trim, re-install that, too), and you're done.
01 May 2007
Lock, set, mismatch.
So, things have been quiet on the home improvement front lately. I've done a couple of little touch-up jobs, like scraping away the weird grout bits that I didn't wipe off properly when i grouted the bath, but nothing really worth discussing. This week we have ambitious plans to clear and finish the dining room, but that may have to wait a couple of weeks.
What I did get done was to make the exterior cellar door secure. Warning - excessive use of parentheses follows.
The door concerned is an old, wood and plate glass door, similar to the original front door, but an obviously inferior model. It has, until now, had a rim latch with a little "lock" lever on it, and no other lock. This level of "security" was "reinforced" by a lovely old wooden screen door with a hook latch. Nothing here that would deter a casual vandal, let alone an intent burglar. Fortunately, this is a small town, and pretty safe, so it really wasn't that big of a deal. Til now.
However, I grew up in the city and have the requisite skittishness of someone who grew up with deadbolts on every door. There have been a few sleepless nights over that security hole. Then our insurance agent mentioned that having deadbolts on every entry would lower our insurance premium - so we bought new locks for every exterior door. And didn't install them. Well, okay, we installed them. One at a time, over a period of MONTHS. The new front door got one, and the back door got one, and the cellar door ... didn't.
Tangentially, we had removed the perfectly good, but ugly and unnecessary, aluminum storm windows from the formerly exterior interior windows on the now-enclosed front porch (that's quite a sentence). This gave us three entire storm windows to stick in the cellar. The only glass window in the house that had no protection from hail, or other weatherizing of any kind, was the plate glass cellar door. I had an epiphany, and decided to mount one of the spare storms over the glass panel on this door.
After installing the storm window over the glass panel (It's no prizewinner, looks wise, but I think I can pretty it up with some paint or mouldings.), I finally mounted the plain silver deadbolt we'd bought almost a year ago. That was an exercise in Making It Work - the door had been trimmed on the latch side to fit the frame, probably 80 years ago, and was almost too narrow to mount the lock without damaging the door or the glass. I ended up cutting a much smaller hole than called for by the lock's installation instructions, just large enough to fit the lock's mounting screws through, cutting the tube hole, then using my Dremel's drill saw to carve out just enough space to fit the end of the tube latch into the door. I love my Dremel.
Mounting the the strikeplate on the frame was a pain, as usual, but I managed, after only three false starts. There is now double glass and a deadbolt on the cellar door, along with its old and and ugly, but reliable, rim-mount knob set.
The dear old wooden screen door is coming off, and it will probably get replaced with the old modern storm door (also removed from the now-interior front door), for an extra layer of weather safety. We'll be refinishing the wooden screen door and mounting it on the back screen porch, probably when I get the screencloth put up on the naked screen mounting strips.
On the military front, Chris is finally processed back in. And barely in time - our savings ran out last month, we had to borrow from my mother to get by. He'd taken a leave of absence from work when he was asked to return to active duty, but we had no idea it might take six months, only one month of which was due to Chris training for his physical. Well, everything is okay now, and we're just waiting for orders.
I don't know how I'm going to face moving if we have to. We're just getting started.
Subscribe to:
Posts (Atom)